❣DIY Old Farmhouse Using Cardboard Boxes❣
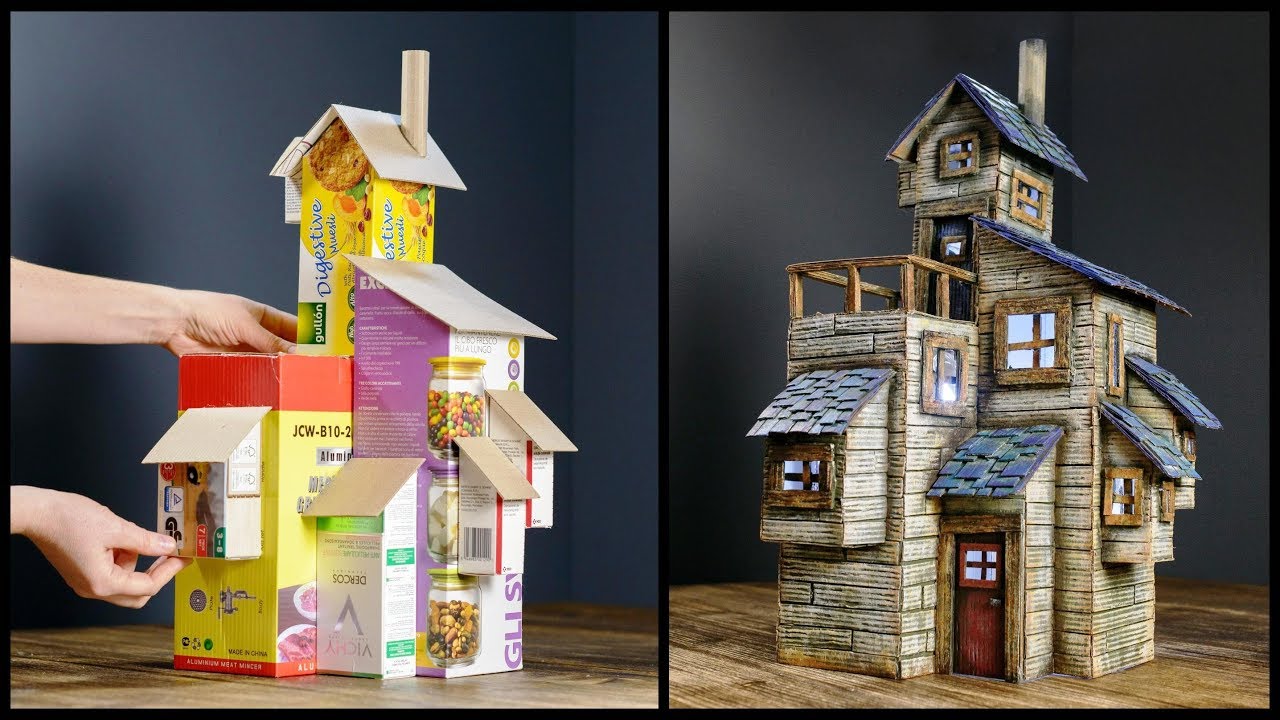
I made an old farmhouse recycling some cardboard boxes I had laying around. The only things I bought were the colors and the hot glue. It took me about four days to finish.
I tried to use all kinds of cardboard boxes, big, small, thick and thin. I had a general idea of how I want to place them so I started by cutting the tops where the roofs should fit. Then I made the cardboard roofs and glued them in place. Next I drew the windows and doors and cut them out. Cutting cardboard in mid air can be a challenge so please be careful and take your time. I added a chimney and the basic shape was finished. I started adding small wooden boards all over the surface of the house. They will look awesome once they will be textured and painted. For the roof tiles I cut small rectangular cardboard pieces. I used pizza boxes for those because the cardboard is thinner. You always want to start your roof from the bottom and work your way up. Take your time and do this right because the roofs are important parts of the house. Visually you first see the roofs and the textured surfaces so don’t rush and make big tiles just to finish sooner. Do this step right and you will end up with an amazing little house. I made the textured wood using a ball pen and pressing the wooden pattern deep in the cardboard. This texture adds such a nice realistic effect and it helps a lot in the next step when adding color and patina. I start the painting of the farmhouse by covering the surface in a dark color first. This will serve as a base. I made this color go in all the cracks and the deepest holes. It will act like a shadow and contrast layer when we add brighter colors. Then I add a very bright color, or even white, only to the surface of the texture, gently rubbing the brush with very little pigment so I don’t get it in the cracks. On top of that bright color you can add other colors as well. You can make it brighter and more colorful, it’s your choice. I hope you liked my video and got some inspiration to start your own projects. Have fun!
——————————————————————————————————-
Thank you for being here! You are one of the few people who actually read my video description, so thank you!
——————————————————————————————————-
Tools & Materials:
Acrylic paint – http://amzn.to/2s8KaIZ
Lights – http://amzn.to/2t1oRqQ
Hot glue gun – http://amzn.to/2sO7EkF
DISCLAIMER: These are affiliate links, which means that if you click on one of the product links and buy something, I’ll receive a small commission with no additional cost to you. This help support the channel and allows me to continue to make videos like this. Thank you for the support!
——————————————————————————————————-
Music: «Fresh Fallen Snow» by Chris Haugen
——————————————————————————————————-
Popular Videos:
DIY Witch House Using Cardboard – https://www.youtube.com/watch?v=G3H7a1Ykdfc
DIY Fairy House Lamp Using Coke Plastic Bottles – https://www.youtube.com/watch?v=-XfylbVpZXA
DIY Fairy House Lamp Recycling TRASH https://www.youtube.com/watch?v=Y6xi56W7cAE
——————————————————————————————————-
So like, comment and subscribe to my channel for more videos
https://www.youtube.com/c/CreativeMom?sub_confirmation=1
Connect with me on Facebook and Twitter
https://www.facebook.com/CreativeMother
Let me know what you think in the comments section below!
Thank you!
Related videos
Leave your comment Cancelar la respuesta
Lo siento, debes estar conectado para publicar un comentario.


